

home> USER GUIDE > Fingerprint browser> YunLark
YunLark
1. Open the browser and click New

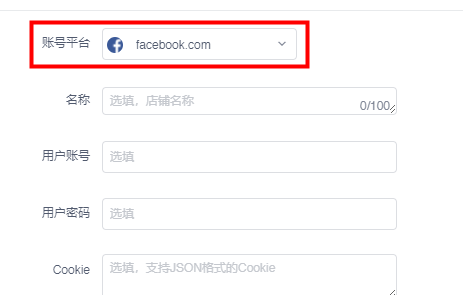
2. Select the platform you want to use. Platform account password and other information are optional.

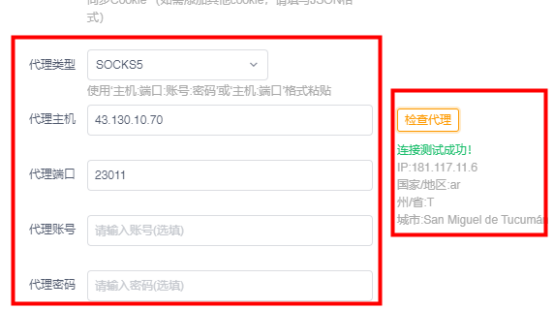
3. Select the proxy type you want to use. Here we take socks5 as an example. Fill in the proxy host and port. If you are using a static proxy, you need to fill in the proxy account and password. You can see your account and password in the IP management interface, and then Click Check Proxy. If the connection test is successful, click OK.

4. You can see the successfully configured proxy in your store management interface. Click to open it to use it.


.png)


.svg)


.svg)
.svg)
.svg)


