 Language

What is a Residential IP Proxy?
The use of residential proxy has become something that many companies have chosen to do in recent years, and its concept is very popular in the field of network applications. Residential proxies are a must for businesses that require anonymity, security, geolocation flexibility, and improved performance !
Here I recommend Lunaproxy

Øvalue for money
LunaProxy brings you the best residential proxy service on the market, you can enjoy a 200M+ large IP pool for only $0.8/GB
Ø195+ locations worldwide
Agents in every corner of the globe, with city-level targeting.
ØAverage 99.9% success rate
The average success rate is 99.9%. Our proxy rotation means you are in control of your sessions and avoid IP bans and captchas
ØAccurate positioning
Each residential IP provided by LunaProxy is a real mobile or desktop device with a pinpointed physical location.
ØChange IP on the fly
Use a simple API to request to change your IP and get a new residential proxy from the pool almost instantly.
Øauto rotate
Automatically switch and change your residential IP proxy at set intervals. Specify how often you want the auto-rotation to be precise every minute, for up to 72 hours!
ØUnlimited concurrent sessions
No limits and constraints - send an unlimited number of concurrent sessions
ØOvercoming bans, captchas and suspensions
With more advanced features than any other provider, you'll never have to worry about getting banned again.
Lunaproxy tutorial
Step 1 - Proxy Preparation
Before starting the integration, we need to choose a plan in lunaproxy.com and prepare a proxy.
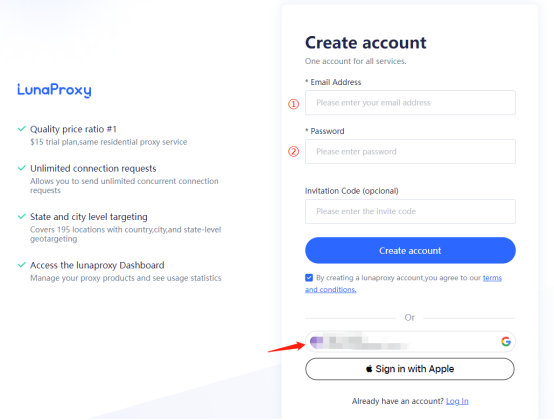
1. Sign up for an account (if you haven't) /1. Enter your email 2. Enter your password (you can also choose Google)
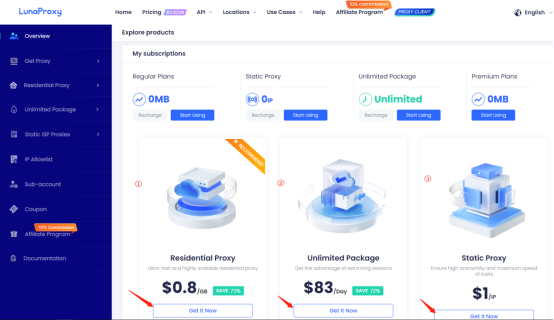
2. Go to Dashboard.
3. If you are accessing the dashboard for the first time, you will be prompted to choose a plan if desired.
4. After selecting the scheme, go to the Get Proxy menu → User & Pass Auth, and select the desired proxy.
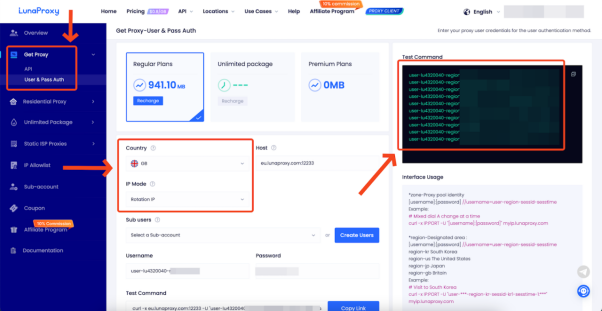
5. Select the country you want, proxy type, here I choose the UK and rotate IP
6. Copy the host, port, login, and password of the generated Proxy.
7. To get the URL link for Proxy management, go to the API tab.
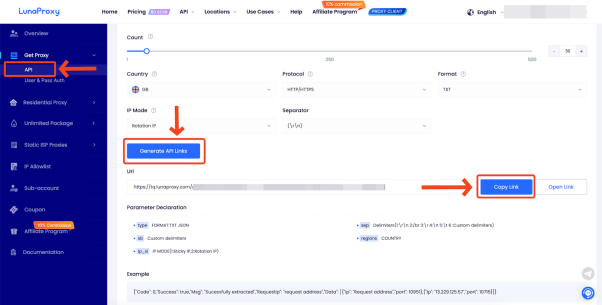
8. The Proxy is ready to be configured.
Then you can configure it with any fingerprint browser or directly on the mobile terminal!


